Open the Web-based Development Workbench
Using the SAP HANA Developer Edition or SAP HANA Cloud Platform
The workbench allows you to develop on HANA without the need to set up a local development environment.
Login to the HANA Cloud Cockpit with your free developer edition account.
Using the SAP HANA Developer Edition or SAP HANA Cloud Platform
The workbench allows you to develop on HANA without the need to set up a local development environment.
Login to the HANA Cloud Cockpit with your free developer edition account.
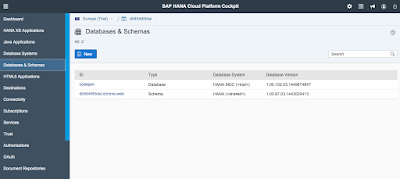
Choose Databases and Schemas, and choose then the instance that you created in the previous tutorials. From here you can access the Workbench.
You are now in the Editor and can immediately start developing in HANA.
Using HANA on Amazon AWS or Microsoft Azure
Access the web page of your HANA server using the IP address of your server. Enter the address http://XXX.XXX.XXX.XXX to the address bar of your browser. (Replace XXX.XXX.XXX.XXX with the IP address of your server.)
On the web page, there is a link in the middle column for Web-Based Development Workbench. Click this link to start the workbench.
Create your catalog object
Our first step will be to create a package to organize our files. To do this we will create a new package under our existing codejam package and call it data.
Now that we have a location for our objects we will create our schema file, this will be a new file called MYCJ which is short for “My CodeJam” but you can actually call it anything you like.
Now that we have a home for our table, we will go ahead and define a simple table. So it’s time for a new file called mydata.hdbdd, again you can call it whatever you like.
In this file we will define our table entities.
namespace codejam.data;
@Schema: 'MYCJ'
context mydata {
type SDate : UTCTimestamp;
type SString : String(40);
type LString : String(255);
@Catalog.tableType : #COLUMN
Entity Book {
key ID: Integer;
BOOKNAME: LString;
CATEGORY: LString;
INVDATE: SDate;
};
};
Once you save this, you should see (provided no mistakes in typing) the following output in the console.
Now for a bit of sample data into our CSV file and then we can automatically import that into the new table.
Now we will create the automatic import file.
Once we save the file, our data should automatically import into our table.
In order to now view our data we will need to ensure our user has access to it, for this we will need to create a new role and assign it to our user.
Now we will need to open the “Security” tab and add this new role to our user.
There now we are set to view the data from the “Catalog” tab.
The resulting view shows the SQL query executed when we clicked the “Open Content” button.
Now let’s access this data from a SAP HANA application.
Access Data from a HANA Application
You must have finished the previous tutorial “Hello World! Develop your first HANA Application using Web-based Development Workbench” so that you have a working hello world application ready.
Go back to the Editor and open the already existing mylibrary.xsjs.
Replace the current code in the mylibrary.xsjs file with the following code that opens a database connection, prepares a simple SQL statement, executes it and returns the result of the query:
$.response.contentType = "text/html";
var output = "My Personal Library!<br><br>";
//Open a database connection
var conn = $.db.getConnection();
//Prepare a simple SQL statement on the system table "DUMMY"
var pstmt = conn.prepareStatement('SELECT * FROM "MYCJ"."codejam.data::mydata.Book"');
//Execute the query
var rs = pstmt.executeQuery();
//Check the query result
if (!rs.next()) {
//Something went wrong: Return an error
$.response.setBody("Failed to retrieve data");
$.response.status = $.net.http.INTERNAL_SERVER_ERROR;
} else {
//All went fine: Return the Query result
output = output + "This is the response from my SQL:<br><br>";
output = output + rs.getString(1) + '' + rs.getString(2) + '' + rs.getString(3) + '' + rs.getString(4) + '<br>';
}
//Close the database connection
rs.close();
pstmt.close();
conn.close();
//Return the HTML response.
$.response.setBody(output);
Save the file using the Save button or by pressing ctrl+s. Again, the successful save is confirmed in the console.
Now you are ready to run the application.
You can even loop through all records like this,
while (rs.next()) {
output = output + rs.getString(1) + '' + rs.getString(2) + '' + rs.getString(3) + '' + rs.getString(4) + '<br>';
}
Deploy, Run and Test the Application
Now the application is ready to be tested. As you are developing with the Web-based Development Workbench the application is already deployed and activated so you can immediately continue to test it.
Select the mylibrary.xsjs file to enable the Run on Server in the toolbar. Then click the Run on Server button:
The application will open in your browser and greet you with My Personal Library and the just accessed data from your table:
Congratulations: You have just accessed your first data on SAP HANA!
Source: go.sap.com


