Prerequisites:
Assign an Elastic IP Address
Assigning an Amazon EC2 Elastic IP Address (EIP) to your AWS instance eases the administration of SAP HANA One. Elastic IP addresses are static IP addresses that can be assigned to your instance and can also quickly be re-mapped to replacement instances if needed.
- Log into the AWS console.
- Select Elastic IPs from the left hand side of the page.
- Please note the IP address from aws marketplace and host name
- Instance is running in AWS console and has passed 2X2 check.
- Use Google Chrome (version 24 or higher) or Firefox Mozilla (version 18 or higher) web browser
Assign an Elastic IP Address
Assigning an Amazon EC2 Elastic IP Address (EIP) to your AWS instance eases the administration of SAP HANA One. Elastic IP addresses are static IP addresses that can be assigned to your instance and can also quickly be re-mapped to replacement instances if needed.
- Log into the AWS console.
- Select Elastic IPs from the left hand side of the page.
- Select Allocate New Address and choose the network topology from the EIP used in list that matches the network topology of your SAP HANA Portal instance.
- Important: If you deploy your instance into the EC2 classic topology, the Elastic IP address becomes unmapped when you stop your instance. Make a note of the IP address and re-map it each time you restart your instance. If you deployed your HANA instance into a Virtual private cloud, the Elastic IP address remains mapped unless you manually un-map it.
- Select Associate Address and choose your AWS SAP HANA instance from the Instance list.
- You can now use the listed static IP address to connect HANA studio or other applications to your SAP HANA AWS instance.
Configure SAP HANA One
Prerequisites:
Google Chrome (version 24 or higher) or Firefox Mozilla (version 18 or higher) web browser
Procedure:
1. Log on to the SAP HANA One Portal Console. To get to the Portal Console type the elastic IP address, or the public DNS name, of your SAP HANA One Portal instance in the address bar of an internet browser.
2. Wait till Initial HANA settings are updated
3. Enter the Access Key ID and Secret Access Key to validate your credentials.
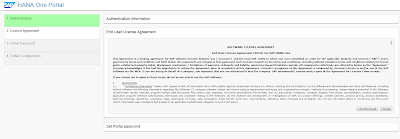
4. Read the End User License Agreement (EULA) and click I Accept.
5. Set the SAP HANA One Portal Console password and click Setup HANA Portal.
6. Upon completing Setup HANA Portal, Portal console page gets displayed as follows.
Click on the card to configure HANA – Setup using
- AWS credentials
- HANA Passwords – hdbadm and SYSTEM passwords
HANA Configuration starts on the Portal page. Once this is done, the HANA is ready for use
On Portal, once can manage multiple instances by clicking on individual card.
You may launch more instance HANA One from the Product list by clicking on
Install and Configure SAP HANA Studio
SAP HANA Studio is available to download from within your SAP HANA One Console. Use SAP HANA Studio to build SAP HANA applications as well as monitor and maintain your cloud instance.
Prerequisites:
- Your SYSTEM password
- Google Chrome (version 24 or higher) or Firefox Mozilla (version 18 or higher) web browser
Procedure:
1. Log on to the SAP HANA One Portal Console. To get to the Portal Console type the elastic IP address or the public DNS name of your SAP HANA One Portal instance in the address bar of an internet browser.
2. Click on the IP address of the respective HANA instance you wish to work with, this will open a new browser tab for SAP HANA One Instance Console page.
3. Go to Downloads. From the HANA One Downloads tab, download the SAP HANA Studio for your operating system.
4. Run the downloaded hdbsetup.exe file to install SAP HANA Studio.
5. Launch SAP HANA Studio from the Start menu
Configure HANA Studio
1. For HANA One, add the following entry to C:\Windows\System32\drivers\etc\hosts
<EIP> hanaserver hanaserver.compute-1.amazonaws.com
Example:
xx.xx.xx.xxhanaserver hanaserver.compute-1.amazonaws.com
Where xx.xx.xx.xx is the EIP (Elastic IP).
EIP is the Elastic IP or Public name of your HANA One server.
Note: This step is required to allow Studio to be fully functional on Microsoft Windows. Add one entry at a time. For HANA One this step is no longer necessary once you upgrade HANA version.
The following steps are done automatically when you upgrade HANA within HANA One. However, if you change your IP or DNS name, you need to make the changes manually in the HANA Studio.
- In the administration editor of HANA Studio, choose the Configuration tab. A list of all configuration files appears.
- Expand the global.ini configuration file.
- Select the section public_hostname_resolution and from the context menu choose Add Parameter. The Add Parameter Wizard opens.
- Choose Next and enter the values map_<servername> in the Key field and your IP or public DNS in the Value field. For example, set the values as Key: map_hanaserver, Value: xx.xx.xx.xx if you use an IP address including an Elastic IP. If you use DNS as the value it could be ec2-xx-xx-xx- xx.compute-1.amazonaws.co
2. Launch the HANA studio and select Add System from the right-click menu.
3. Enter the Elastic IP Address or the Hostname of your SAP HANA AWS instance.
4. Enter the SAP HANA Database user name and password and click Finish. Check in SAP HANA studio for connection status of HANA.


